Register with your embassy and save local emergency numbers before departure: 112 (EU), 911 (US/Canada), 000 (Australia). Upload scanned passport and insurance documents to two separate cloud accounts, keep an encrypted copy on your phone and a paper photocopy locked away from your passport.
Choose accommodation with 24/7 reception, verified ID checks and CCTV, and at least a 4.0 average from a minimum of 20 recent reviews. Confirm arrival instructions with the host; cancel bookings that do not reply within 2 hours. Opt for places within a 15–30 minute walk of public transport or main streets to reduce late-night transit.
Use licensed taxis or ride-hailing apps that display driver name, photo and plate; always share live location with one trusted contact for every ride. Avoid unlit streets after 11:00 PM; if you must travel late, stick to main roads, sit behind the driver and keep doors locked. Carry a compact door alarm or portable doorstop and a personal alarm rated ≥ 120 dB.
Enable two-factor authentication for email, banking and travel apps, and add an emergency contact on your phone lock screen. Preload offline maps and key addresses, purchase a local SIM or eSIM on arrival, and bring a 20,000 mAh power bank for 2–3 full phone charges. Share a daily plan with two contacts and set two check-ins per day.
Buy travel insurance that covers medical evacuation and theft; target at least $100,000 medical and $250,000 evacuation coverage. Pack a 7-day supply of prescription meds in original packaging with a printed prescription, plus a basic first-aid kit with blister treatment, antiseptic wipes and pain relievers.
Carry cash equal to 3 days of expected expenses and split it between a hidden pouch and a locked bag; notify card issuers of travel dates and enable travel alerts. If a place or person makes you uncomfortable, move immediately to a staffed public location such as a café, hotel lobby or 24-hour shop and contact local authorities if needed.
Research Local Safety Risks, Laws, and Solo Traveler Alerts
Check your government travel advisory (for example, U.S. Department of State, UK FCDO, or your country’s foreign affairs site) and register with your embassy or consulate – enroll in STEP or the equivalent to receive official alerts and evacuation notices.
Verify laws that directly affect daily behavior: penalties for drug possession and trafficking, alcohol regulations and permitted areas, restrictions on photographing government buildings or military sites, gender-specific dress codes, LGBTQ+ statutes, curfew rules, and mandatory identification-carry requirements. Search the local penal code or consular fact sheets for exact articles and penalties rather than relying on hearsay.
Set up real-time monitoring: create Google Alerts for the city name plus keywords like “protest”, “strike”, “violent crime”, or “natural disaster”; follow local English-language news outlets and official police or municipal social media accounts; subscribe to weather alerts from MeteoAlarm, NOAA, or the national meteorological service for the area.
Confirm public-transport and ride safety: check whether taxis must display licensing, prefer app-based services with driver and plate details, screenshot the driver and plate before entering, and avoid unofficial vehicles at night. For motorbike or scooter use, verify helmet and license requirements and check accident statistics for the route or operator.
Assess accommodation risk by reading recent reviews (filter for the last 30–90 days), checking lighting and external locks, confirming 24/7 staff or security presence, and noting proximity to hospitals and police stations. Ask the host or hotel which neighborhoods to avoid after dark and whether there have been recent security incidents.
Compile emergency contacts and documents: store embassy/consulate phone numbers, local emergency numbers, your insurance policy number, and a local contact; upload encrypted copies of passport and insurance to cloud storage and carry a printed copy; leave a detailed itinerary and daily check-in schedule with a trusted person.
Use local crime mapping and safety-reporting sites (Numbeo, local police crime maps) and read recent traveler reports on forums and social channels to identify common scams and high-risk blocks. Cross-check multiple sources and prioritize reports from the last 30 days for current relevance.
If a law enforcement encounter happens, request to contact your consulate immediately, remain calm, avoid signing documents without an interpreter present, and note badge numbers and the location of the station. Notify your embassy as soon as possible and follow their instructions for legal support and local lawyers.
Plan and Share a Detailed Itinerary with Trusted Contacts
Share a complete, timestamped itinerary with at least two trusted contacts and register your trip with your embassy (for U.S. citizens use STEP).
What to include in the itinerary
- Travel schedule: airline, flight numbers, PNR/reservation codes, departure and arrival dates and local times; include planned buffer times between connections.
- Accommodation details: name, full address, phone number, reservation code, check-in and check-out times.
- Local transport and transfers: booked train/bus times, rental car company and reservation, pickup/drop-off locations and driver contacts.
- Daily plan with timestamps: tour operator names, meeting points, start times and estimated end times for high-risk activities.
- Emergency contacts: local emergency numbers (police, ambulance, fire), nearest embassy/consulate address and phone, and two domestic emergency contacts.
- Health and insurance: primary medical conditions, prescription names and doses, nearest hospital addresses, travel insurance policy number and 24/7 claims phone.
- Documents and backups: scanned passport, visa and ID copies (store encrypted), photocopy stored separately, and the last four digits of cards for identification only.
- Contingency instructions: alternate meeting points, planned timeout thresholds for missed check-ins, and a designated person to escalate if primary contacts are unavailable.
How to share, update and escalate
- Primary sharing: upload a password-protected PDF to a trusted cloud (Google Drive, iCloud) and give access to contacts; send the password by a different channel (call or SMS).
- Live tracking: enable temporary live-location sharing (Apple Find My, Google Maps or WhatsApp live location) only for the time you need and set automatic expiry.
- Printed backup: leave a printed itinerary and photocopies of critical documents with one contact at home and carry a separate photocopy in your luggage.
- Update protocol: send an update within 2 hours after any change to flights or accommodation; confirm arrival at each new location within 2 hours of landing or check-in.
- Check-in schedule and escalation: perform a daily check-in by 20:00 local time; if no check-in, contact the traveler by call/text within 3 hours; if still no response after 6 hours, notify the alternate contact and the nearest embassy/consulate; if 24 hours pass without contact, request local authorities to perform a welfare check.
- Privacy and security: share only necessary details, avoid posting live plans on public social media, remove location tags from public posts, and use two trusted contacts rather than a public group.
- Automation options: use a shared calendar with alerts for reservations, and consider trusted check-in apps that allow automatic notifications to contacts.
More information and official advice: U.S. Department of State – Before You Go.
Choose and Vet Solo-Friendly Accommodation and Hosts
Choose listings within a 10-minute walk of public transit and within a five-minute walk of a 24/7 convenience store, pharmacy, or medical clinic to reduce late-night risks and shorten emergency response times.
Confirm address and building exterior on Google Street View and recent guest photos; check nighttime lighting, visible security features, and nearby open businesses. Cross-check the address against local police crime maps or SpotCrime for incidents in the last 12 months; avoid blocks with repeated reports of muggings or break-ins.
Prioritize properties that list specific safety features: deadbolt and chain, peephole, lockable bedroom doors for shared stays, working smoke and carbon monoxide detectors, and a visible fire extinguisher. If a listing lacks details, message the host and require photos or a statement that those devices are present and tested within the past year.
Vet hosts by searching review text for words like “solo,” “female traveler,” “late check-in,” “quiet,” and “private entrance.” Give extra weight to reviews posted in the last six months; a string of outdated reviews masks recent decline in standards. Treat hosts with multiple last‑minute cancellations or unresolved complaints as high risk.
Use the platform’s verification signals: verified ID, high response rate (under one hour preferred), and a history of consistent, recent bookings. Ask the host for typical check-in procedures and whether they provide contact numbers for local support; a professional-sounding, clear reply within a day indicates reliable communication.
For shared homes or homestays request a private room with a lockable door and confirm which common areas are shared. If the host will be present, arrange to meet in a public area first, check their official platform ID, and avoid sharing sensitive personal details such as passport numbers beyond what the platform requires.
Never pay outside the booking platform; use only the platform’s secure payment system or a card that offers dispute protection. Decline wire transfers, direct bank requests, or cash-only terms. Keep booking receipts and screenshots of messages, listing rules, and cancellation policy.
Plan arrivals during daylight when possible. If you must arrive late, request a coded entry or meet-the-host arrangement, and ask the host to confirm that entry codes change between guests. Share your arrival time and full address with a trusted contact and set a check-in time they can expect your confirmation.
If a host requests unusual house rules–overnight guest limits that conflict with your plans, photo ID outside platform verification, or access to your personal devices–decline and report the listing. Use platform dispute channels for any safety or fraud concerns and save all correspondence for evidence.
Keep a short pre-booking checklist saved on your phone: verify address and transit time, confirm safety devices and locks, read reviews from the past six months, confirm host response time and verification, and ensure payments stay on-platform. Use that checklist before confirming any solo trip reservation.
Protect Cash, Cards, and Travel Documents on the Move
Keep only $50–100 (or local equivalent) in your day wallet; split remaining cash into three places: a concealed money belt, a locked piece of luggage, and a small hidden stash in clothing. Store enough money outside your day wallet to cover 2–3 days of unexpected expenses.
Carry one primary card and one backup card stored separately. Put all cards in RFID-blocking sleeves and tuck unused cards into a secure pouch inside your luggage. Memorize PINs; never write them on or near the card.
Use a slim neck pouch or flat money belt under clothing for crowded transport and tourist sites. For city walking, prefer a slash-resistant crossbody bag worn across the chest with lockable zippers and internal compartments; keep the zipper facing you and the strap short.
Withdraw cash at bank branch ATMs during daylight hours; avoid standalone or poorly lit machines. Inspect card slots and keypads for irregularities, cover your hand when entering PINs, and compare withdrawal receipts to your bank app immediately.
Leave your passport in the hotel safe unless required for ID or border crossings. Carry a single, laminated photocopy of the passport data page and visa pages in a separate pocket, plus an encrypted digital scan stored in a secure cloud and on an offline USB kept in locked luggage.
Keep travel documents and emergency contacts in a waterproof zip pouch. Include printed copies of your itinerary, travel insurance policy number, and embassy contact information for the countries on your route.
Enable transaction alerts and two-factor authentication on banking apps; save issuer contact numbers in your phone and on a paper card kept apart from your wallet. If a card is lost or stolen, act fast: block the card via app or call the issuer, then use your backup card.
Use a portable travel safe with a steel cable to secure valuables to fixed objects in a room, and add tamper-evident bags for items you rarely access. Check statements daily while traveling and report any unauthorized charges within 24–48 hours.
Set Up Reliable Communication, Local SIMs, and Check-In Routines
Buy an unlocked phone or confirm your carrier has unlocked it, then install a local SIM or eSIM within the first hour of arrival and test connectivity immediately.
Check the phone’s IMEI (dial *#06#) before you travel; carriers require an unlocked IMEI for local SIMs and eSIM activation. Bring a photo of the IMEI and your carrier account details as backup.
Choose between local physical SIM and eSIM: local SIMs usually cost $5–30 with 3–30 GB prepaid plans; eSIMs from providers such as Airalo, Holafly or GigSky typically offer regional bundles starting around $3–10 for 1 GB and $10–30 for 5–15 GB. Buy eSIMs pre-trip for immediate activation or buy a physical SIM at an official carrier store on arrival to avoid scams and registration issues.
Match plan size to usage: messaging + maps = 150–500 MB/day; casual browsing = 500 MB–1.5 GB/day; streaming or video calls = 2–6 GB/day. Run a Speedtest after activation; if speeds are under 3–5 Mbps on 4G, switch providers or use Wi‑Fi for heavy tasks.
Use a dual-SIM phone to keep your home number active (calls/SMS) and use the second slot for local data. If your phone uses eSIM, keep a small emergency eSIM (1 GB) as a backup for critical moments.
Protect access: enable Find My (Apple) or Find My Device (Google), set a strong lock screen, and add an ICE (in-case-of-emergency) contact or Medical ID visible from the lock screen. Store passport scans and reservation confirmations encrypted in the cloud and offline on your device.
Carry hardware backups: a 10,000–20,000 mAh power bank (USB-C PD preferred) provides 2–4 full phone charges; take a short USB-C to USB-A cable if needed, and a compact international travel adapter. Turn on low-power mode and disable background app refresh for longer battery life during long days.
Establish a check-in routine: urban stays – check in once every 8–12 hours; remote areas or hikes – check in every 2–4 hours or at pre-agreed checkpoints; arrival at a new accommodation – check in immediately. Set alarms or scheduled messages so you don’t skip a check.
Create a check-in template and share it with contacts: “Status: OK / Need help; Location: [Google Maps link]; Place: [hotel/hostel name]; ETA: [time]; Notes: [activity].” Use Google Maps Live Location or WhatsApp Live Location for 2–8 hour sharing windows when you want continuous tracking.
Design a contact escalation plan: primary contact waits X hours for reply (suggest 6–12 hours in cities, 2–4 hours in remote areas), then alerts secondary contact who has full itinerary and reservation details. Give both contacts access to important documents and accommodation addresses.
Automate where useful: schedule nightly check-ins with message apps, use iOS Shortcuts or Android automation to send “I’m OK” at fixed times, and pin emergency numbers and your embassy contact in your phone for one-tap access. Look up the local emergency number on arrival and save it as a contact (examples: 112 in the EU, 911 in the US, 000 in Australia).
Test all systems within the first hour at a café or airport Wi‑Fi: make a test call, send messages, share live location for 5–10 minutes, and confirm your backup power and SIM switching process so you can rely on the setup during the trip.
Pack Medical Supplies, Emergency Contacts, and a Simple First Aid Kit
Carry all prescription medications in your carry-on, in original pharmacy bottles, with a copy of the prescription and a short doctor’s note listing diagnosis, generic drug names, dosages, and contact details; pack an extra 7–14 days’ supply in case flights or schedules change.
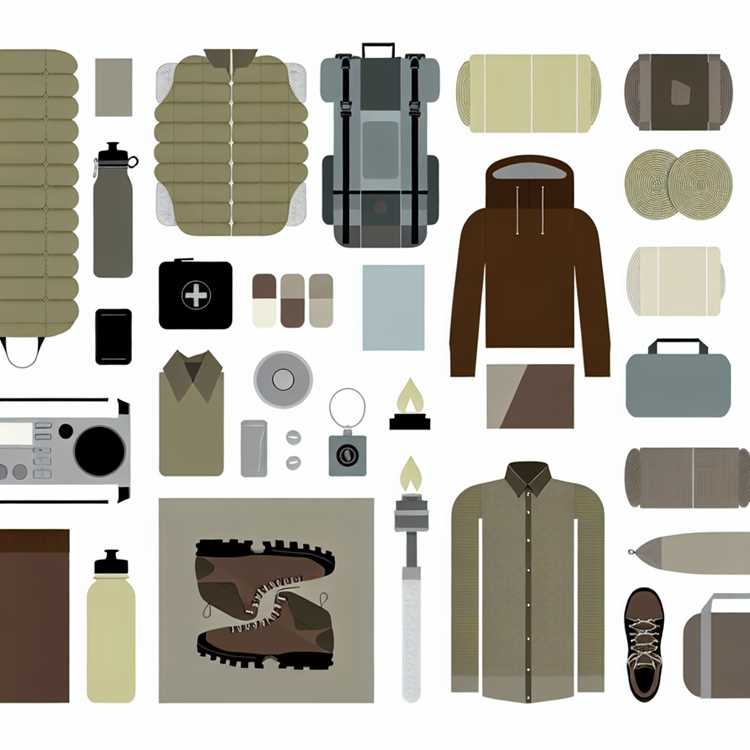
First aid kit checklist (compact, luggage-friendly)
- Adhesive bandages – assorted sizes, 20 pieces
- Sterile gauze pads – 4 x 4″, 6 pieces
- Adhesive tape – 1 roll (15 mm)
- Antiseptic wipes – 10 individually wrapped
- Topical antibiotic ointment – 10 g tube
- Hydrocortisone cream 1% – 15 g (for itch/inflammation)
- Blister plasters – 6 pieces
- Elastic bandage (ACE) – one 7.5 cm x 3 m
- Tweezers, small scissors, and safety pins – one each
- Digital thermometer – compact
- Disposable gloves – 2 pairs
- CPR face shield – 1
- Oral rehydration salt sachets – 6
- Pain/fever reliever: paracetamol 500 mg – 20 tablets
- Anti-inflammatory: ibuprofen 200 mg – 20 tablets (if tolerated)
- Antihistamine: cetirizine 10 mg – 10 tablets
- Antidiarrheal: loperamide 2 mg – 6 tablets
- Small flashlight or headlamp and a whistle – one each
Prescription & special-medication handling
- Keep medications in carry-on to avoid temperature extremes in checked baggage.
- For insulin and photosensitive meds, use an insulated case with gel packs and a signed clinician letter noting the need for refrigeration.
- If you require injectable emergency meds (EpiPen, glucagon), carry two doses, the prescription, and clear usage instructions; check airline and local regulations before travel.
- For controlled substances, carry a doctor’s letter on clinic letterhead with generic drug names, doses, dates, and international contact info; check country-specific import rules and obtain permits when required.
Pack pills in labeled, resealable plastic bags inside a small hard-case first-aid kit. Keep a duplicate basic kit in checked luggage and a travel-size kit in a daypack for excursions.
Emergency contacts & documentation
- Create a laminated emergency card with: full name, blood type (if known), major allergies, chronic conditions, current medications (names + doses), two emergency contacts (name + relation + phone in international format), travel insurance company and policy number, and embassy/consulate phone for the destination.
- Store digital copies of the card, prescriptions, passport photo page, and insurance in a secure cloud folder and email them to a trusted contact.
- Program ICE (In Case of Emergency) contacts into your phone and add an unlocked-screen medical ID with key data that first responders can access.
- Before departure, note the local emergency number(s) for each country you’ll visit (example: 112 works across the EU; verify the local short code for non-EU countries) and the nearest embassy/consulate address and after-hours number.
Print brief medical-condition and allergy statements in the local language (use a reliable translation or an official clinic letter). Check expiration dates on all supplies before packing and replace used or expired items during long trips.
Use Public Transport and Rideshares Safely: Route, Driver, and Payment Checks
Confirm the planned route on a map app and pin your destination before boarding.
Before you board
Compare the app route with the fastest or most direct path on a secondary map (Google, Apple, or offline map). Note two alternate routes and estimated travel time so you can spot detours or unnecessary deviations.
Verify driver and vehicle details: match the app photo, full name, license plate, car color and model. Cancel the ride and report immediately if any single detail mismatches. For taxis, check the medallion or company ID and photograph it before entering.
Check the driver’s profile: prefer drivers with ratings ≥4.7 and at least 50 completed trips. If the profile lacks sufficient trips or the rating is low, request another vehicle.
During the ride
Sit in the back seat on solo trips and keep your phone accessible. Share live location and ETA with a trusted contact through the app or a screenshot link; update the contact if the route changes by more than 20% or the ETA shifts by 10+ minutes.
Watch the route on your phone and call out any major deviations immediately. If the driver refuses to follow the app’s route, ask to be dropped at a well-lit public area or end the ride and request a new driver. For public buses and trains, verify route numbers and final destination signs before boarding; exit at the next stop if signage or announcements are missing.
Prefer cashless transactions through the official app, contactless card, or NFC payment. When you must use cash, prepare exact fare and avoid handing over large bills while distracted; count change in view and get a printed or digital receipt.
| Check | What to look for | Quick action |
|---|---|---|
| Route | App route vs. secondary map; two alternates; ETA | Pin destination, note alternates, monitor deviations |
| Driver / Vehicle | Name, photo, plate, car model/color, medallion (taxis) | Match details, photograph ID, cancel if mismatch |
| Driver profile | Rating ≥4.7 and 50+ trips | Request different driver if below threshold |
| On-board behavior | Sit in back, keep phone ready, share live location | Alert contact, exit at safe public spot if uneasy |
| Payment | App payment, contactless card, exact cash if needed | Use app or tap; count change, save receipt |
Keep screenshots of ride details and the receipt until you reach your destination; use them when reporting discrepancies. If a situation feels unsafe, call local emergency services and the rideshare support line immediately, describe your location, vehicle plate, and driver name, and request an escort from public staff where available.
Q&A:
How can I plan an itinerary that keeps me safe while still allowing room for spontaneous activities?
Research neighborhoods and transport options before you leave, and book your first night and any arrival transfers so you don’t arrive at night without a plan. Choose a base that is well-reviewed and close to public transit; move less frequently if you want more flexibility. Share a basic plan and check-in schedule with a friend or family member and keep digital and paper copies of important documents. Download offline maps and a translation app, buy a local SIM or an eSIM for data, and carry a portable charger. Limit unplanned long trips after dark, and trust your instincts: if a place feels unsafe, leave and find a public, busy spot. Keeping a loose framework for each day makes it easier to add spontaneous activities while reducing risk.
Are there specific precautions solo female travelers should take that differ from general solo travel advice?
Some precautions overlap with general safety tips, but a few practical adjustments help. Prioritize accommodation with good reviews about safety and location, well-lit surroundings, and secure locks; consider women-only options if they make you more comfortable. Dress in ways that respect local customs to reduce unwanted attention. Use reputable ride apps or hotel-arranged taxis at night, and avoid walking alone in poorly lit or unfamiliar areas after dark. Share your plans and live location with a trusted contact, and arrange regular check-ins. Carry a small personal alarm or whistle and keep essential items like phone, keys, and a card in an easy-to-reach pocket. A short self-defense course can boost confidence and give useful skills. Finally, make decisions based on how safe you feel rather than on pressure to do something risky.
What should I do if I need medical help while traveling solo?
Before departure, locate hospitals and clinics near where you will stay, note emergency numbers, and pack a basic first-aid kit plus any prescription medicines in their original packaging with a note from your doctor if needed. Buy travel insurance that covers medical treatment and evacuation, and keep the insurer’s contact details and your policy number handy. Make a short medical summary (allergies, chronic conditions, medications, blood type) and store copies on your phone and with a trusted contact back home. If you need urgent care, call local emergency services or your insurer’s helpline for guidance on approved providers. If language is a barrier, use a translation app or a written medical card in the local language explaining allergies and critical needs.
How can I protect my money and cards while traveling alone, and what should I do if a card is lost or stolen?
Split cash and cards between a few secure spots—hotel safe, money belt, hidden pocket—so you’re not left stranded if one stash is lost. Use one primary card for most purchases and a backup stored separately. Inform your bank of travel dates to reduce the chance of transactions being blocked, and enable transaction alerts so you see suspicious activity immediately. Prefer ATMs inside banks or well-lit areas, check for signs of tampering before inserting your card, and cover the keypad when entering your PIN. Keep small amounts of cash for local markets and use cards for larger purchases. Store scanned copies of passports and card numbers in a secure cloud location and write down emergency bank phone numbers. If a card is lost or stolen, report it to your bank right away to block it; use your bank’s app or phone number to freeze accounts and arrange emergency replacement or cash support. A decoy wallet with a small amount of cash can help if you face a mugging, allowing you to hand over less while keeping main funds safe.

